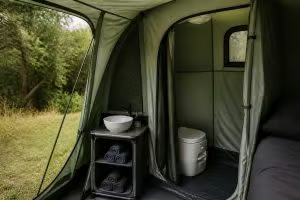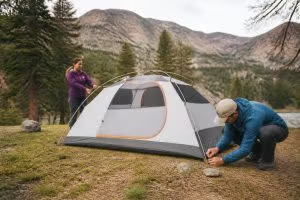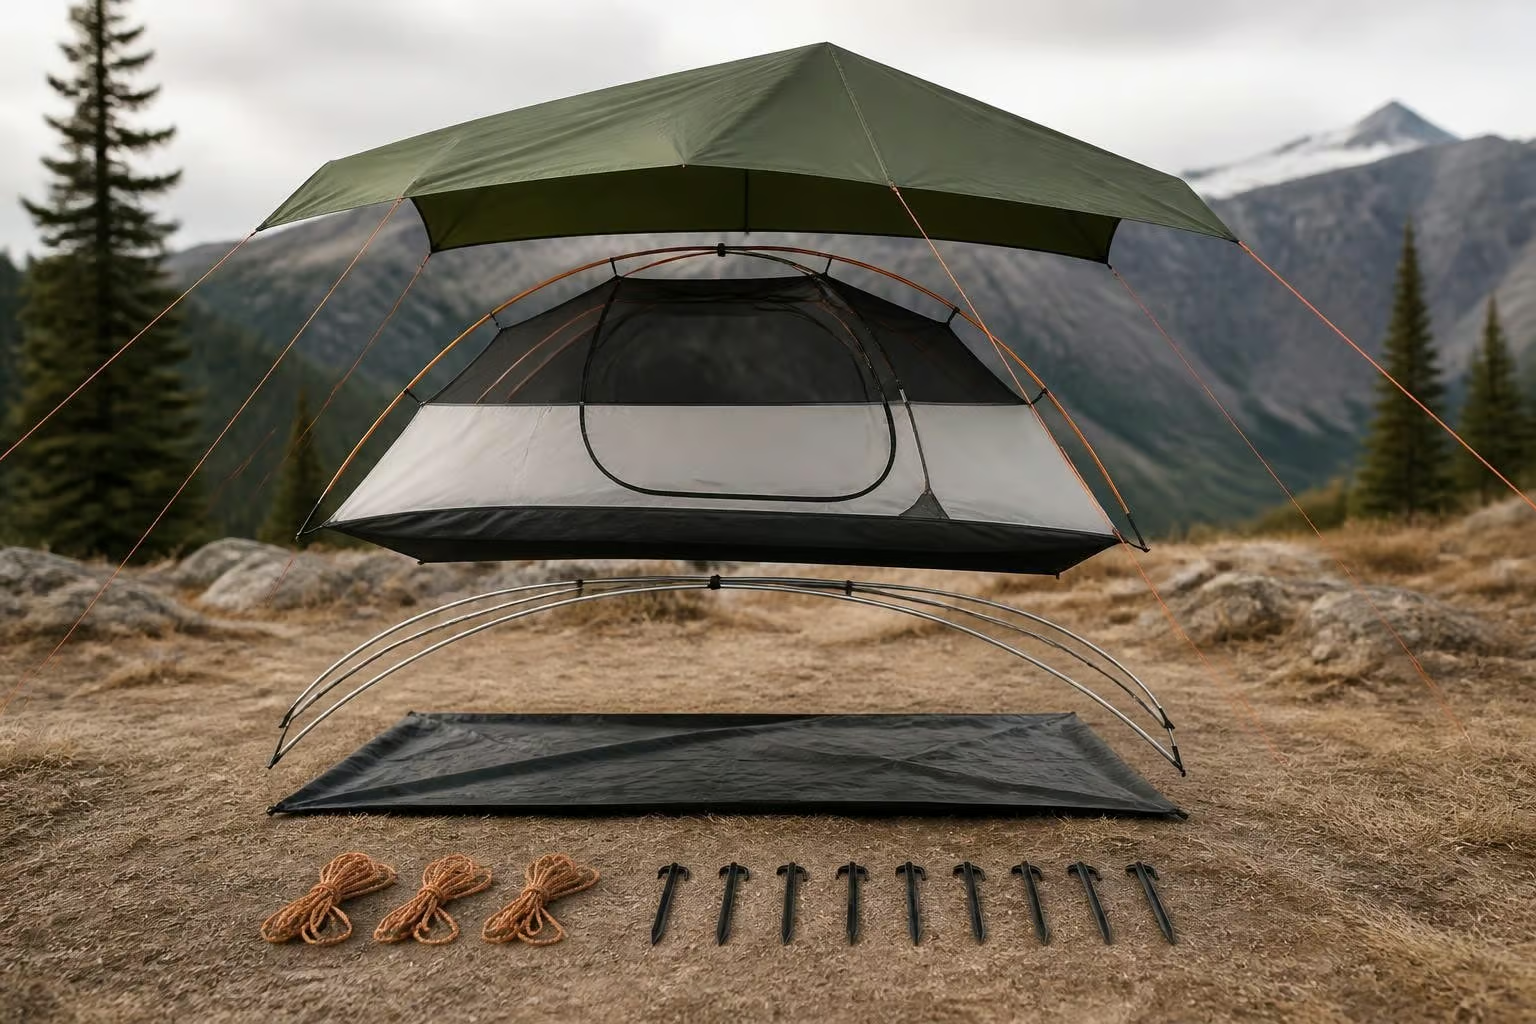
Understanding the parts of the tent is essential for anyone who spends time outdoors, whether you're a weekend camper, a safari guide, or someone setting up semi-permanent outdoor accommodation. Each component plays a specific role in keeping you dry, protected, and comfortable. When you know how these parts work together, you can pitch your tent faster, maintain it better, and choose the right shelter for your next adventure. This guide breaks down every major component, explaining what each part does and why it matters in the field.
The tent body forms the main living space where you sleep, store gear, and take shelter from the elements. This primary structure is typically made from breathable fabric, often ripstop nylon or polyester, though canvas tents like those popular in South Africa use heavier cotton-blend materials for superior durability and breathability.
The canopy design varies significantly between tent types. Single-wall tents integrate waterproofing directly into the body fabric, while double-wall designs separate the breathable inner tent from a waterproof outer layer. This distinction affects weight, condensation management, and overall performance in different climates.
The inner tent in a double-wall system provides the living space with mesh panels that maximize airflow and reduce condensation. These mesh sections allow moisture from breath and body heat to escape while keeping insects outside. The fabric portions offer privacy and block wind that might penetrate through mesh alone.
Key features of quality tent bodies include:
The outer shell or rainfly covers the inner tent to provide weather protection. According to the National Park Service camping guidelines, proper rainfly setup is critical for weather resistance and creating dry vestibule space for gear storage.
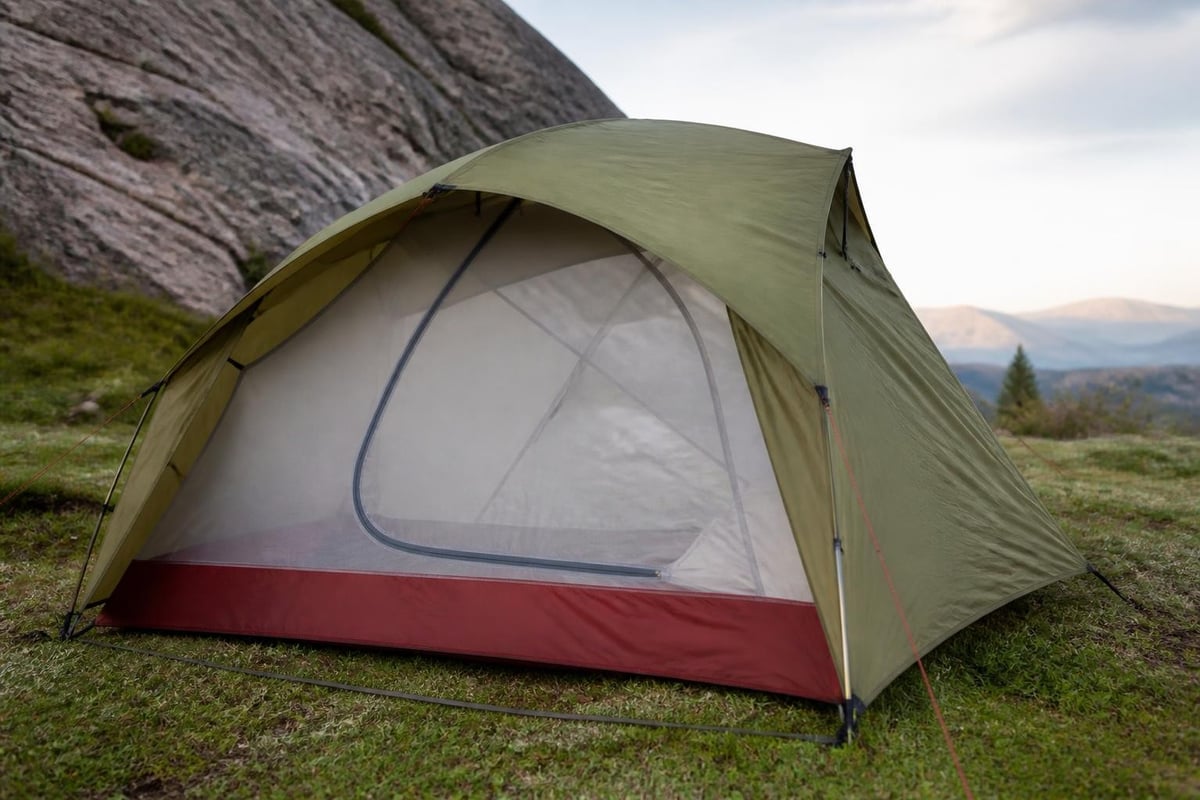
The rainfly represents one of the most critical parts of the tent for weather protection. This waterproof cover shields the tent body from rain, UV damage, and wind. Most rainflies are made from coated nylon or polyester with taped seams to prevent water intrusion at stitching points.
Full-coverage rainflies extend close to the ground, offering maximum protection in severe weather. Partial rainflies save weight but leave portions of the tent body exposed, which works well in dry climates or ultralight setups. The gap between rainfly and inner tent creates an air channel that reduces condensation buildup.
Modern rainflies use various coating technologies to achieve waterproofness. Polyurethane (PU) coatings are common and affordable, while silicone treatments offer better tear strength and UV resistance. According to Tarp Tent’s technical guide, silicone/PU hybrid coatings balance performance and cost effectively.
| Coating Type | Waterproof Rating | Durability | Weight | Cost |
|---|---|---|---|---|
| Polyurethane (PU) | 1500-3000mm | Good | Light | Low |
| Silicone | 2000-5000mm | Excellent | Very Light | Medium |
| Silicone/PU Hybrid | 1200-3000mm | Very Good | Light | Medium |
| PVC (Heavy Canvas) | 5000mm+ | Exceptional | Heavy | High |
The waterproof rating measured in millimeters indicates how much water pressure the fabric can withstand before leaking. Quality rainflies typically exceed 1500mm, while floors often need 3000mm or higher ratings due to ground pressure.
Tent poles create the framework that gives the tent its shape and structural integrity. These crucial parts of the tent must be strong enough to withstand wind loads while remaining light enough for practical transport. Modern poles typically use aluminum alloy, fiberglass, or carbon fiber construction.
Pole types include:
Aluminum poles offer the best strength-to-weight ratio for most camping applications. They flex under wind pressure without breaking, then return to their original shape. Fiberglass costs less but weighs more and can splinter when it fails. Premium tents use high-grade alloys like DAC Featherlite or Easton aluminum for maximum performance.
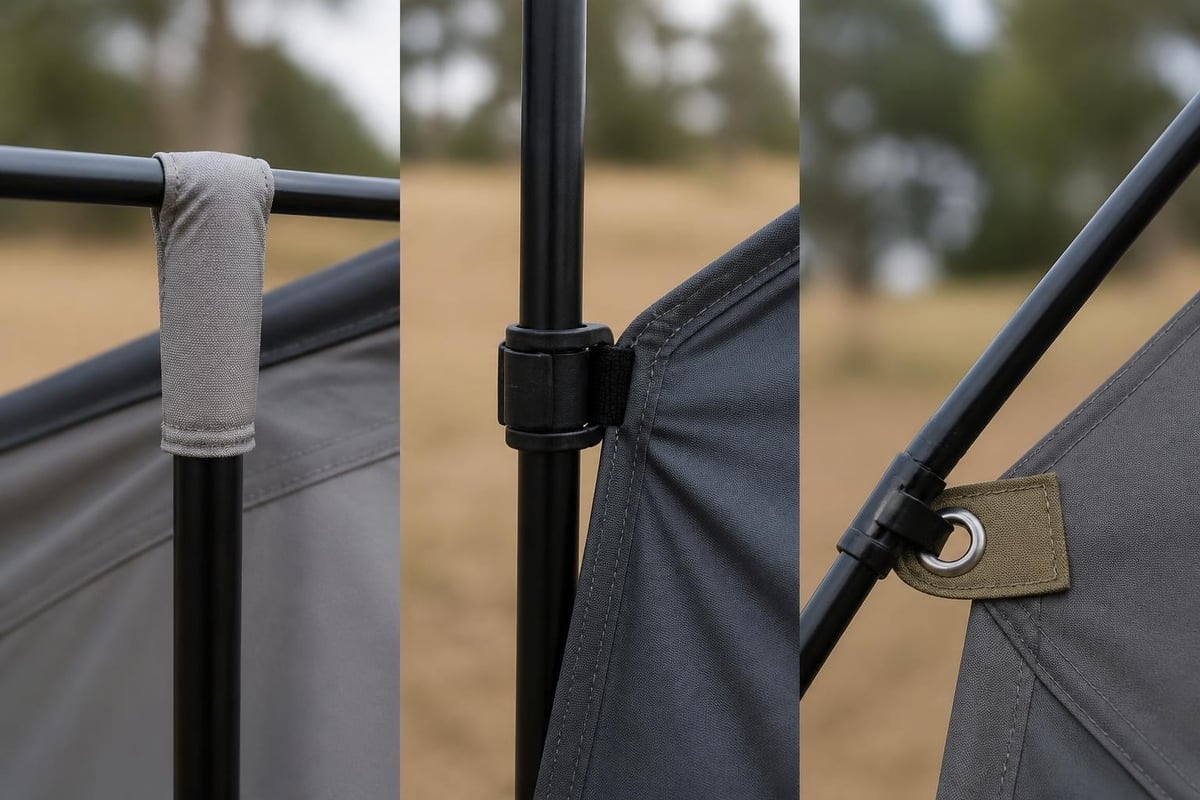
The connection between poles and tent fabric happens through sleeves, clips, or grommet systems. Pole sleeves create a smooth fabric tunnel the pole slides through, distributing tension evenly. This design appears in many canvas tents designed for South African conditions, where durability matters more than setup speed.
Clip systems attach the tent body to pre-erected poles, making setup faster and allowing the inner tent to hang away from the rainfly for better ventilation. Grommets at corners and peaks create solid anchor points where poles insert directly, handling high stress loads at critical junctions.
Stakes anchor the tent to the ground, preventing it from shifting or lifting in wind. These essential parts of the tent come in various designs optimized for different soil types and holding requirements. A typical four-season tent requires eight to twelve stakes for the main tent, with additional stakes for guy lines.
Different stake designs work better in specific soil conditions. Standard pin stakes work adequately in firm soil, while broad V-stakes or Y-stakes hold better in sand. Snow stakes feature wide surface area to grip in soft snow, and rock pegs use twisted metal that wedges into rocky ground.
Stake selection guide:
Quality stakes use materials that balance strength and weight. Aluminum stakes bend rather than break under stress, making them reusable. Steel stakes offer superior holding power but add significant pack weight. Titanium stakes provide the best strength-to-weight ratio at premium prices.
The tent floor typically has reinforced webbing loops or grommets at corners where stakes pass through. Some designs use separate stake loops sewn onto the floor or rainfly, creating multiple anchor points that improve stability and tension distribution.
Guy lines are adjustable cords that run from the tent to ground stakes, providing additional stability and proper fabric tension. According to the Wikipedia entry on tent components, guy lines become critical in windy conditions where they prevent pole stress and maintain tent shape.
Most tents come with reflective guy lines that improve visibility at night, reducing tripping hazards. These cords attach to reinforcement points on the rainfly or tent body, typically at the midpoint of each wall and at roof peaks. Proper guy line tension keeps fabric taut, which improves weather resistance and reduces flapping noise.
Line locks allow quick adjustment of guy line tension without retying knots. These small plastic or metal devices grip the cord through friction, letting you pull it tight then lock it in place. Common designs include ladder locks, cord locks, and cam cleats.
The 3m x 6m Safari Lodge Tent uses reinforced guy line attachment points on its 300 GSM ripstop canvas, designed specifically for South African wind conditions. These attachment points distribute stress across wider fabric areas, preventing tear-out in severe weather.
When camping in high winds, adding extra guy lines to any available attachment point increases stability dramatically. Some experienced campers carry additional cord and stakes specifically for reinforcing tents when weather deteriorates unexpectedly.
The groundsheet forms the tent floor, providing a waterproof barrier between you and the ground. This critical component must withstand abrasion from rocks, moisture from below, and the weight of occupants and gear. Quality groundsheets use thicker, more heavily coated fabric than walls or rainfly.
A bathtub floor design curves upward at the edges, typically 4-6 inches, creating a basin that prevents water from running under tent walls during heavy rain. This construction also adds structural rigidity to the tent base. The fabric specifications and hydrostatic ratings for floors usually exceed 3000mm to handle ground moisture and pressure.
A footprint is a separate ground cloth placed under the tent to protect the floor from sharp objects, abrasion, and excess moisture. While not always included with the tent, footprints extend floor life significantly. They're typically cut slightly smaller than the tent floor to prevent rain from pooling between footprint and tent.
Many campers use generic tarps as footprints, though custom-cut footprints match the tent shape precisely and include grommets that align with tent stakes. In permanent or semi-permanent setups, wooden platforms or tent pads eliminate the need for footprints while providing superior protection and comfort.
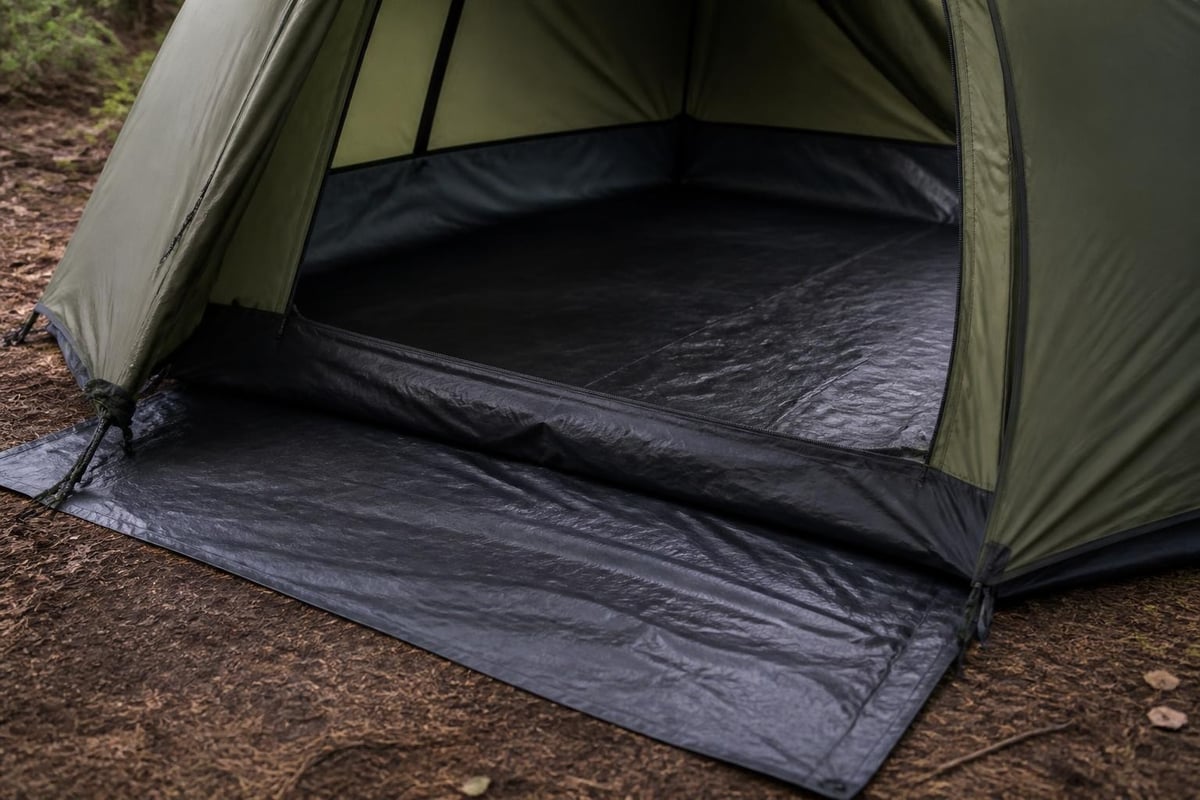
Vestibules are covered areas outside the main tent body but under the rainfly, creating protected storage space for boots, packs, and wet gear. These useful parts of the tent keep mud and moisture out of the sleeping area while maximizing usable space. According to the fly tent article, vestibule size and configuration significantly impact tent livability.
Single-door tents typically have one vestibule, while two-door designs offer vestibules at each end. Larger family tents or expedition tents may feature side vestibules or extended rainfly areas that create substantial covered space. Some designs include zippered vestibule doors for weather protection or security.
Vestibule uses include:
The vestibule floor may be the tent groundsheet that extends beyond the inner tent, or simply bare ground under the rainfly. Extended floors add weight but provide cleaner vestibule space. Mesh or fabric panels at vestibule entries improve weather protection while maintaining some ventilation.
Proper ventilation prevents condensation buildup inside tents, keeping occupants and gear dry. These parts of the tent include mesh panels, vents, and strategic gaps between rainfly and tent body. According to MSR’s condensation guide, effective ventilation design balances airflow with weather protection.
Mesh panels in the tent body allow moisture to escape to the space between inner tent and rainfly. From there, vents at the rainfly peaks or sides exhaust humid air while preventing rain entry. The gap at the bottom where rainfly doesn't reach ground level also contributes to airflow.
Peak vents at the highest point of the rainfly use natural convection to exhaust warm, moist air. These vents often feature adjustable covers that close in severe weather. Low vents near the ground bring in fresh air, creating continuous circulation through the tent.
Some advanced designs incorporate adjustable vents you can open or close from inside using cords or toggles. This control lets you maximize ventilation in warm conditions or minimize heat loss and weather exposure in storms. Multiple smaller vents often work better than single large openings for balanced airflow.
Four-season and winter tents reduce ventilation compared to three-season designs, prioritizing heat retention over maximum airflow. However, they still need some ventilation to prevent dangerous condensation and ice buildup inside the tent.
Tent doors provide access while keeping insects and weather outside. Most doors use coil zippers that resist snagging and work smoothly in dusty or sandy conditions. Door placement affects convenience and ventilation, with opposite-end doors in tunnel tents creating excellent through-ventilation.
Door features to consider:
The mesh inner door maintains ventilation and visibility when weather permits, while the solid rainfly door provides weather protection. You can leave the rainfly door open during dry conditions for maximum airflow, then close it quickly when rain starts. Two-layer door systems give you control over privacy, ventilation, and weather protection independently.
Seams where fabric pieces join represent potential weak points in tents. Needle holes from stitching create tiny openings where water can penetrate. Quality tents address this through seam sealing or seam taping, which are critical parts of the tent's waterproof system.
Factory-taped seams use waterproof tape applied to seam lines during manufacturing, creating reliable waterproofing that lasts for years. This method appears in most quality tents today. Unsealed seams require manual sealing with liquid seam sealer, which you must reapply periodically.
High-stress areas like pole attachment points, stake loops, and door corners receive extra reinforcement. This typically involves bartacking (dense zigzag stitching), additional fabric layers, or both. Reinforcements prevent tearing and extend tent life significantly.
Corner reinforcements often use multiple fabric layers combined with webbing that distributes stress across larger areas. The camping accessories and components that attach at these points benefit from solid reinforcement that handles repeated stress cycles without failure.
Various small parts of the tent enable setup and provide convenience features. These include hook-and-loop straps that gather rolled doors, elastic loops that secure rolled rainflies, and interior hooks for hanging gear or lights. While seemingly minor, these details significantly impact user experience.
Common tent hardware includes:
Repair kits often contain spare versions of these small parts since they're most likely to get lost or damaged. Carrying extra stakes, a short length of cord, and spare tent pole segments lets you address common field failures without ending your trip early.
Pole repair sleeves are aluminum tubes that slip over broken pole sections, creating a temporary splint. These essential repair parts fit in your gear kit and let you salvage a trip when poles fail. They work by bridging the break and distributing stress across a longer section.
Beyond poles, common tent failures include torn fabric, broken zippers, and pulled-out stake loops. The materials and coatings guide explains why modern tent fabrics fail and how preventive maintenance extends their service life.
| Component | Common Failure | Field Repair Solution |
|---|---|---|
| Poles | Cracked segment | Repair sleeve or splint |
| Fabric | Small tear | Duct tape or repair patch |
| Zipper | Separated teeth | Replace slider or safety pin |
| Stake loop | Torn out | Tie cord through fabric |
| Guy line | Broken cord | Replace with spare cord |
| Seams | Leaking | Reapply seam sealer |
Quality tents from manufacturers like Ejenti Outdoor use durable materials and robust construction to minimize field failures, but understanding common problems helps you pack appropriate repair supplies.
Canvas tents use different materials and construction methods than synthetic tents, which affects how their parts function. Canvas breathes naturally, reducing condensation without extensive mesh panels. The heavier fabric provides superior durability and a more substantial feel, though it weighs significantly more than nylon or polyester alternatives.
Canvas tent poles often use heavier-gauge materials to support the additional fabric weight. Steel poles are common in permanent or semi-permanent canvas setups, while aluminum poles appear in portable canvas tents. The robust construction handles the higher loads that wind places on the larger, heavier fabric panels.
According to the ultralight shelter materials guide, modern synthetic tents prioritize weight savings through advanced fabrics and minimal construction. Canvas tents prioritize durability and comfort for extended stays or harsh conditions where weight matters less than long-term performance.
Synthetic tents achieve waterproofing through coatings and laminates applied during manufacturing. Canvas becomes waterproof when the fibers swell with moisture, closing gaps between threads. This natural waterproofing requires initial weathering and benefits from periodic retreatment with waterproofing compounds.
Canvas tent seams typically use stronger thread and more robust stitching patterns than lightweight synthetic tents. The heavier fabric supports these reinforced seams without tearing. However, canvas seams still require sealing or treatment to prevent water penetration at stitch holes.
While not structural parts of the tent itself, certain accessories make setup easier and improve performance. A rubber mallet helps drive stakes into hard ground without bending them. A footprint protector extends floor life. Storage bags keep components organized between uses.
Useful setup accessories:
Many campers create a checklist of all tent parts to verify nothing gets left behind when breaking camp. This habit prevents discovering a missing bag of stakes when you arrive at your next campsite. Organizing small parts in color-coded stuff sacks makes identification and packing more efficient.
Understanding the parts of the tent transforms you from someone who simply pitches a shelter into a knowledgeable outdoor enthusiast who can select, maintain, and repair their equipment confidently. Each component serves a specific purpose in creating a weatherproof, comfortable temporary home in the outdoors. Whether you're choosing a lightweight backpacking tent or a robust canvas shelter for extended safari use, knowing how these parts work together helps you make informed decisions. Ejenti Outdoor manufactures durable tents and outdoor solutions designed specifically for South African conditions, using quality materials and proven construction methods that stand up to demanding field use.